| Platform |
Relative Path to File |
| Android |
Android/Demo/app/src/main/java/com/tencent/qcloud/tim/demo/signature/GenerateTestUserSig.java |
| iOS |
iOS/Demo/TUIKitDemo/Private/GenerateTestUserSig.h |
| macOS |
Mac/Demo/TUIKitDemo/Debug/GenerateTestUserSig.h |
| Windows |
Windows/Demo/IMApp/GenerateTestUserSig.h |
| Web (general) |
Web/Demo/public/debug/GenerateTestUserSig.js |
| Mini Program |
MiniProgram/Demo/static/utils/GenerateTestUserSig.js |
3. Set relevant parameters in the `GenerateTestUserSig` file:
> In this document, an Android project is opened by using Android Studio as an example.
- SDKAPPID: set it to the SDKAppID obtained in [Step 1](#step1).
- SECRETKEY: enter the key obtained in [Step 2](#step2).
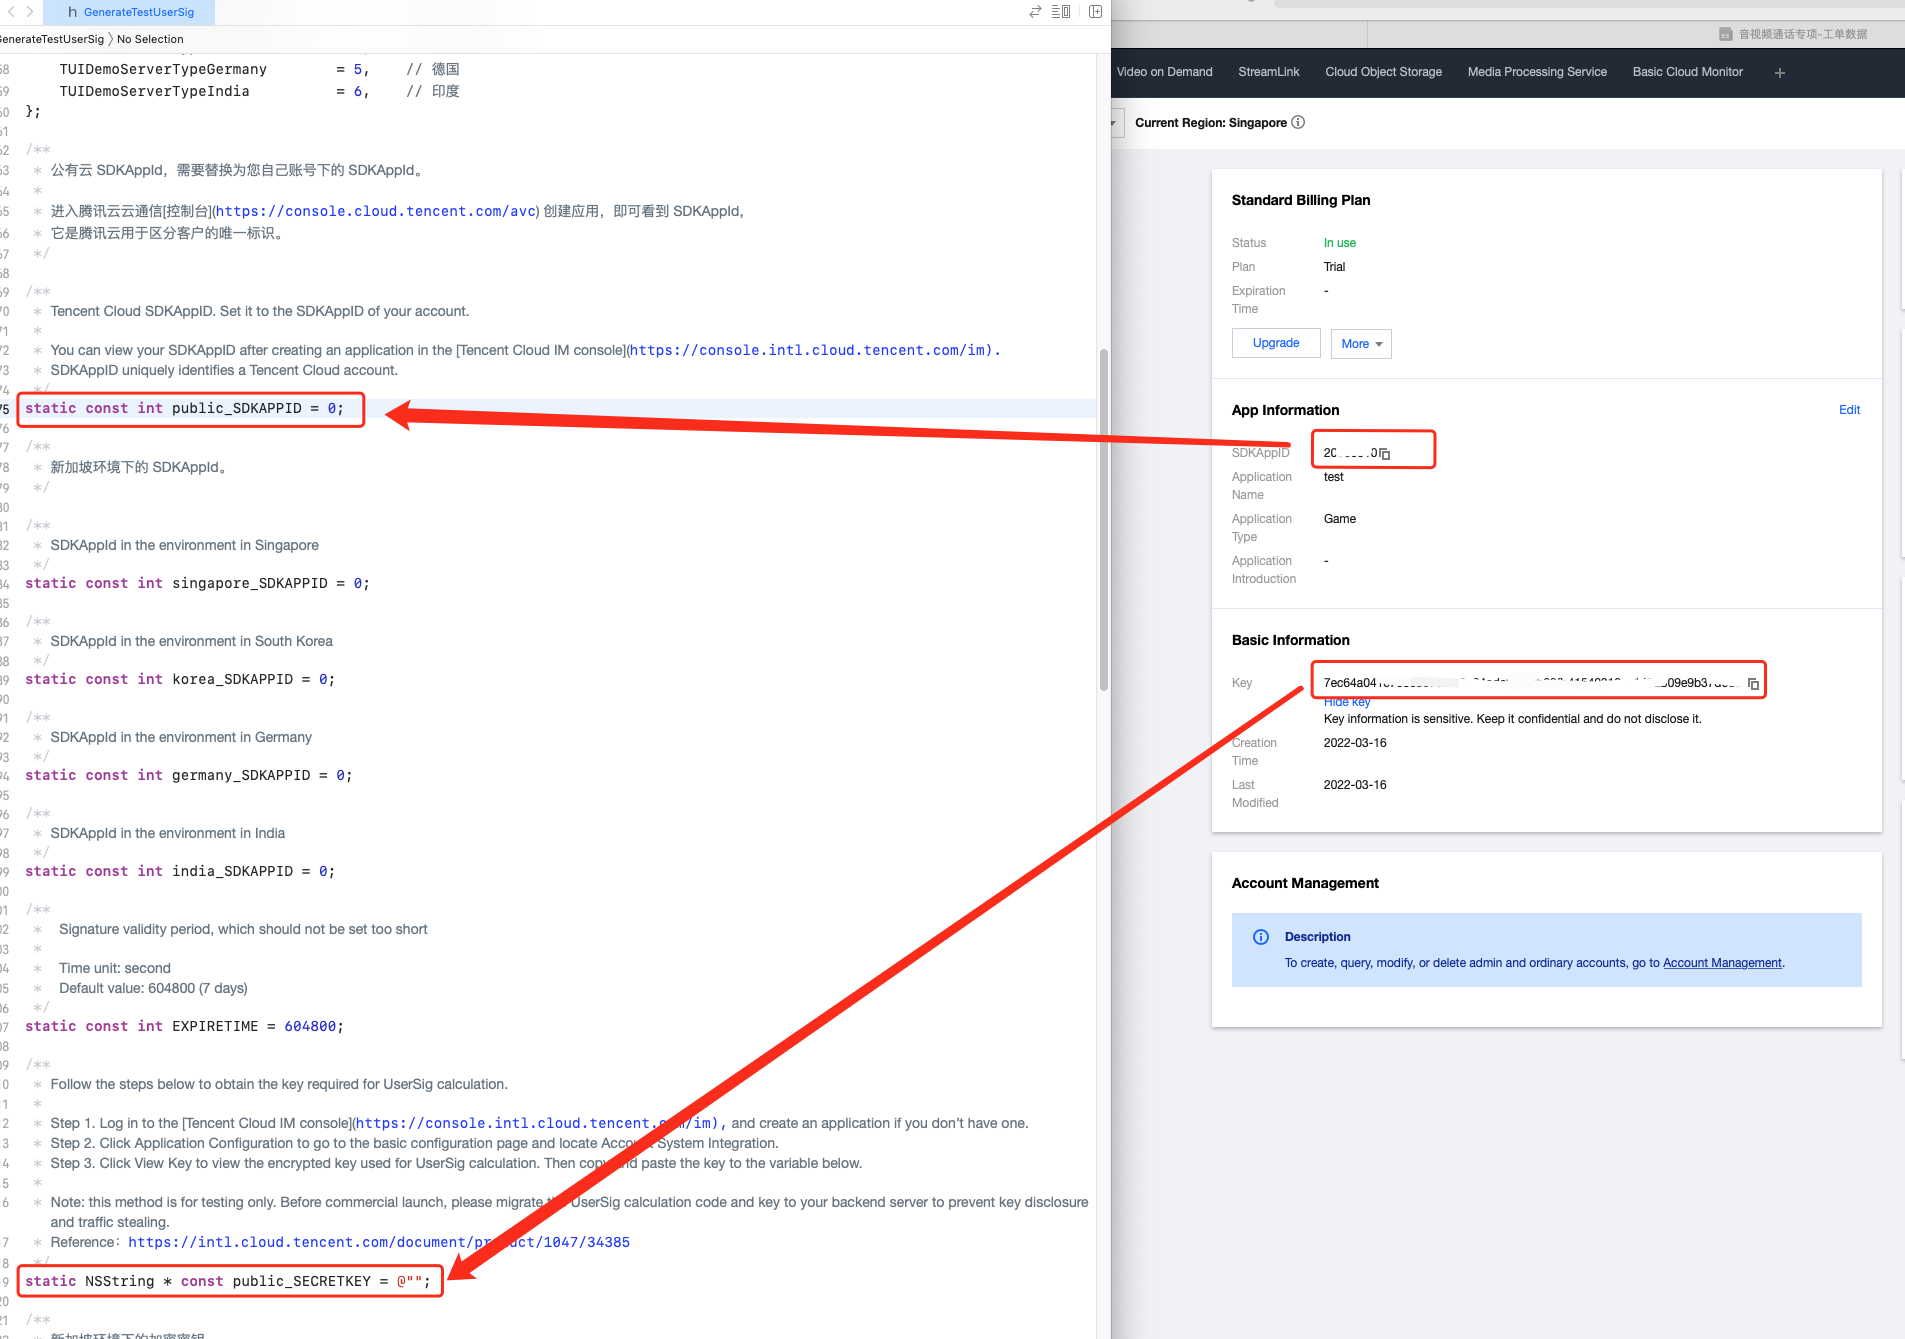
>! In this document, the method to obtain UserSig is to configure a SECRETKEY in the client code. In this method, the SECRETKEY is vulnerable to decompilation and reverse engineering. Once your SECRETKEY is leaked, attackers can steal your Tencent Cloud traffic. Therefore, **this method is only suitable for locally running a demo project and feature debugging**.
>The correct `UserSig` distribution method is to integrate the calculation code of `UserSig` into your server and provide an application-oriented API. When `UserSig` is needed, your app can send a request to the business server for a dynamic `UserSig`. For more information, please see [How do I calculate UserSig on the server?](https://cloud.tencent.com/document/product/269/32688#GeneratingdynamicUserSig).
## Step 4: Compile and Run the Demo (All Features)
1. Run the following command on the terminal to check the pod version:
```objectivec
pod --version
```
If the system indicates that no pod exists or that the pod version is earlier than 1.7.5, run the following commands to install the latest pod.
```
// Change sources.
gem sources --remove https://rubygems.org/
gem sources --add https://gems.ruby-china.com/
// Install pods.
sudo gem install cocoapods -n /usr/local/bin
// If multiple versions of Xcode are installed, run the following command to choose an Xcode version (usually the latest one):
sudo xcode-select -switch /Applications/Xcode.app/Contents/Developer
// Update the local pod library.
pod setup
```
2. Run the following commands on the terminal to load the IMSDK library.
```
cd iOS/Demo
pod install
```
3. If installation fails, run the following command to update the local CocoaPods repository list:
```
pod repo update
```
4. Go to the iOS/Demo folder and open `TUIKitDemo.xcworkspace` to compile and run the demo.
## Step 5: Compile and Run the Demo (Removing the Audio/Video Call Feature)
If you do not need the audio/video call feature, remote it as follows:
1. Go to the `iOS/Demo` folder, comment out the TUICallKit pod in the Podfile, and run the `pod install` command.
```
# pod 'TUICallKit' (Stop integrating the library)
```
2. Go to the **Building Settings** page of the **TUIKitDemo** and set `ENABLECALL` to `0` to disable audio/video call related logic.
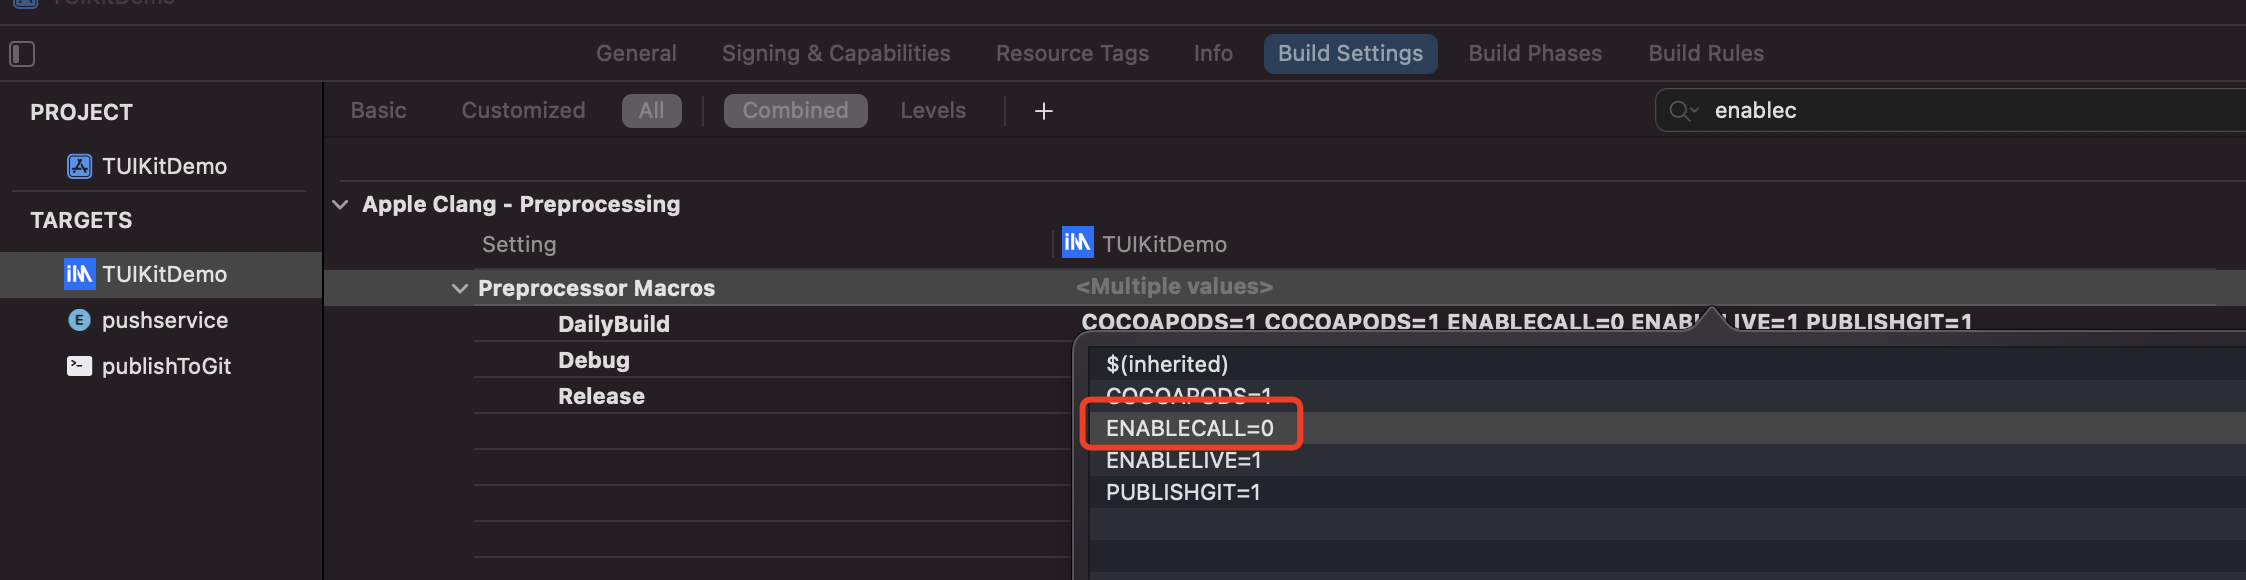
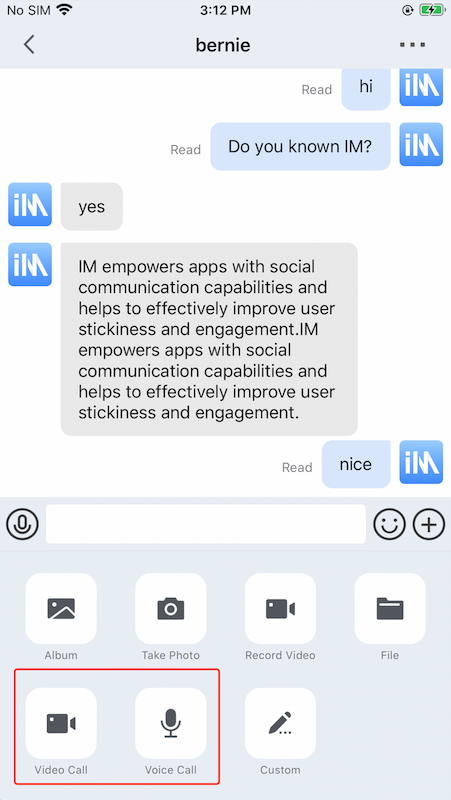
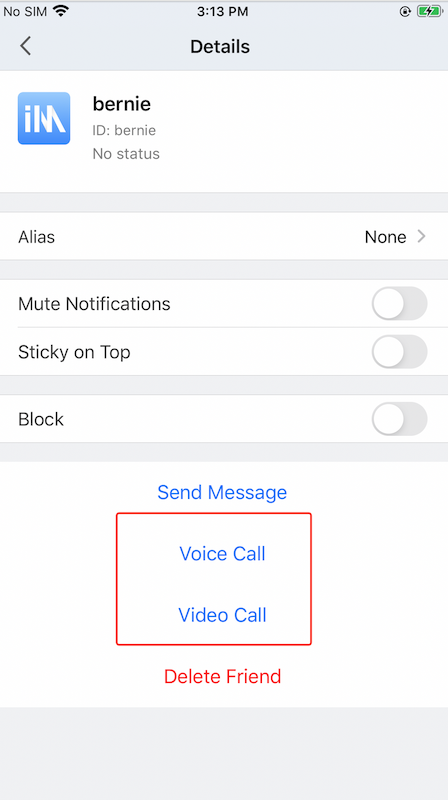
After the preceding steps are completed, the audio and video call entries in the demo are hidden.
The conversation UIs before and after TUICallKit masking are as follows:
 The contact profile UIs before and after TUICallKit masking are as follows:
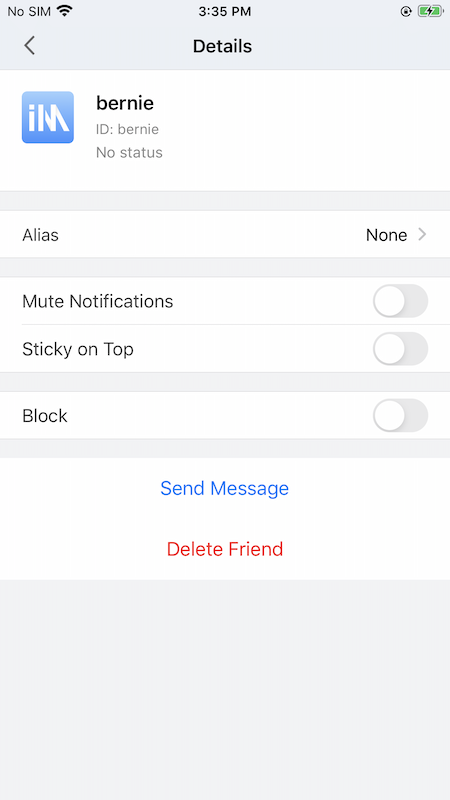 > The above only shows how to remove the audio/video call feature from the demo. Developers can customize the demo according to their business requirements.
## Step 6: Compile and Run the Demo (Removing the Search Feature)
Go to the `iOS/Demo` folder, comment out the TUISearch pod in the Podfile, and run the `pod install` command.
```
# pod 'TUISearch' (Stop integrating the library)
```
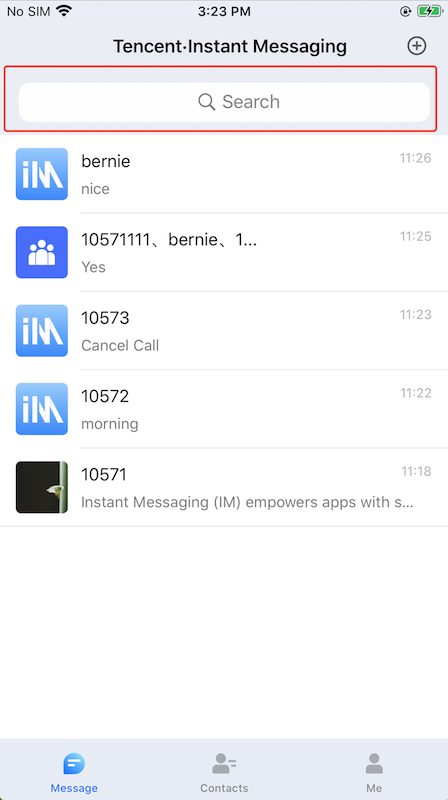
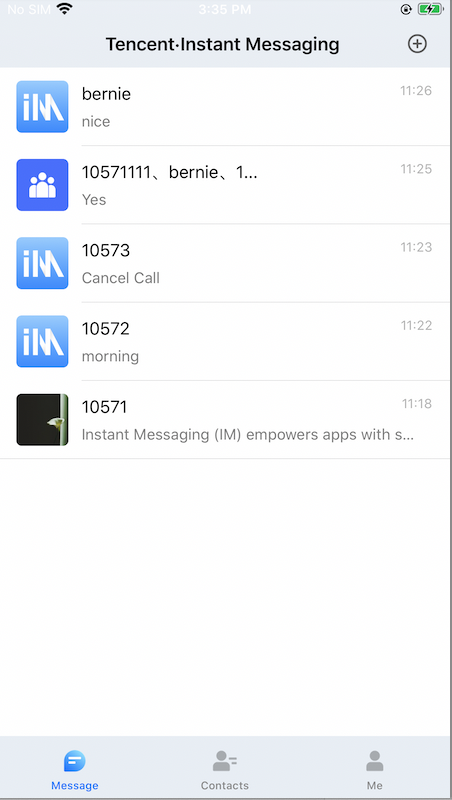
After the preceding steps are completed, the message search box in the demo is hidden.
The message UIs before and after TUISearch masking are as follows:
> The above only shows how to remove the audio/video call feature from the demo. Developers can customize the demo according to their business requirements.
## Step 6: Compile and Run the Demo (Removing the Search Feature)
Go to the `iOS/Demo` folder, comment out the TUISearch pod in the Podfile, and run the `pod install` command.
```
# pod 'TUISearch' (Stop integrating the library)
```
After the preceding steps are completed, the message search box in the demo is hidden.
The message UIs before and after TUISearch masking are as follows:
 > The above only shows how to remove the search feature from the demo. Developers can customize the demo according to their business requirements.