 yiliangwang
Quick Run of TUICalling Demo for iOS
简体中文 | English
This document describes how to quickly run the TUICalling demo project to make a high-quality audio/video call. For more information on the TUICalling component connection process, see Integrating TUICalling (iOS).
Directory Structure
TUICalling
├─ Example              // Audio/Video call demo project
    ├─ App              // Folder of audio/video call homepage UI code and used images and internationalization string resources
    ├─ Debug            // Folder of the key business code required for project debugging and running
    ├─ LoginMock        // Folder of the login UI and business logic code
    └─ TXAppBasic       // Dependent basic components of the project
├─ Resources            // Folder of images and internationalization string resources required by the audio/video call feature
├─ Source               // Folder of the core business logic code of audio/video call
Environment Requirements
- Xcode 11.0 or above
- Operating system: iOS 13.0 or later
- A valid developer signature for your project
Running the Demo
Step 1. Create a TRTC application
- Go to the Application management page in the TRTC console, select Create Application, enter an application name such as
TUIKitDemo, and click Confirm. - Click Application Information on the right of the application as shown below:

- On the application information page, note down the
SDKAppIDand key as shown below: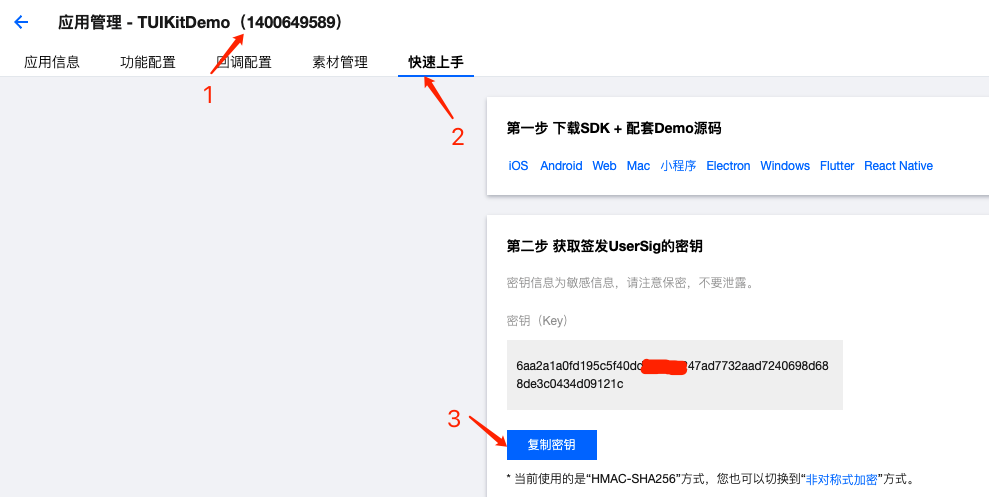
! This feature uses two basic PaaS services of Tencent Cloud: TRTC and IM. When you activate TRTC, IM will be activated automatically. IM is a value-added service.
Step 2. Configure the project
- Open the demo project
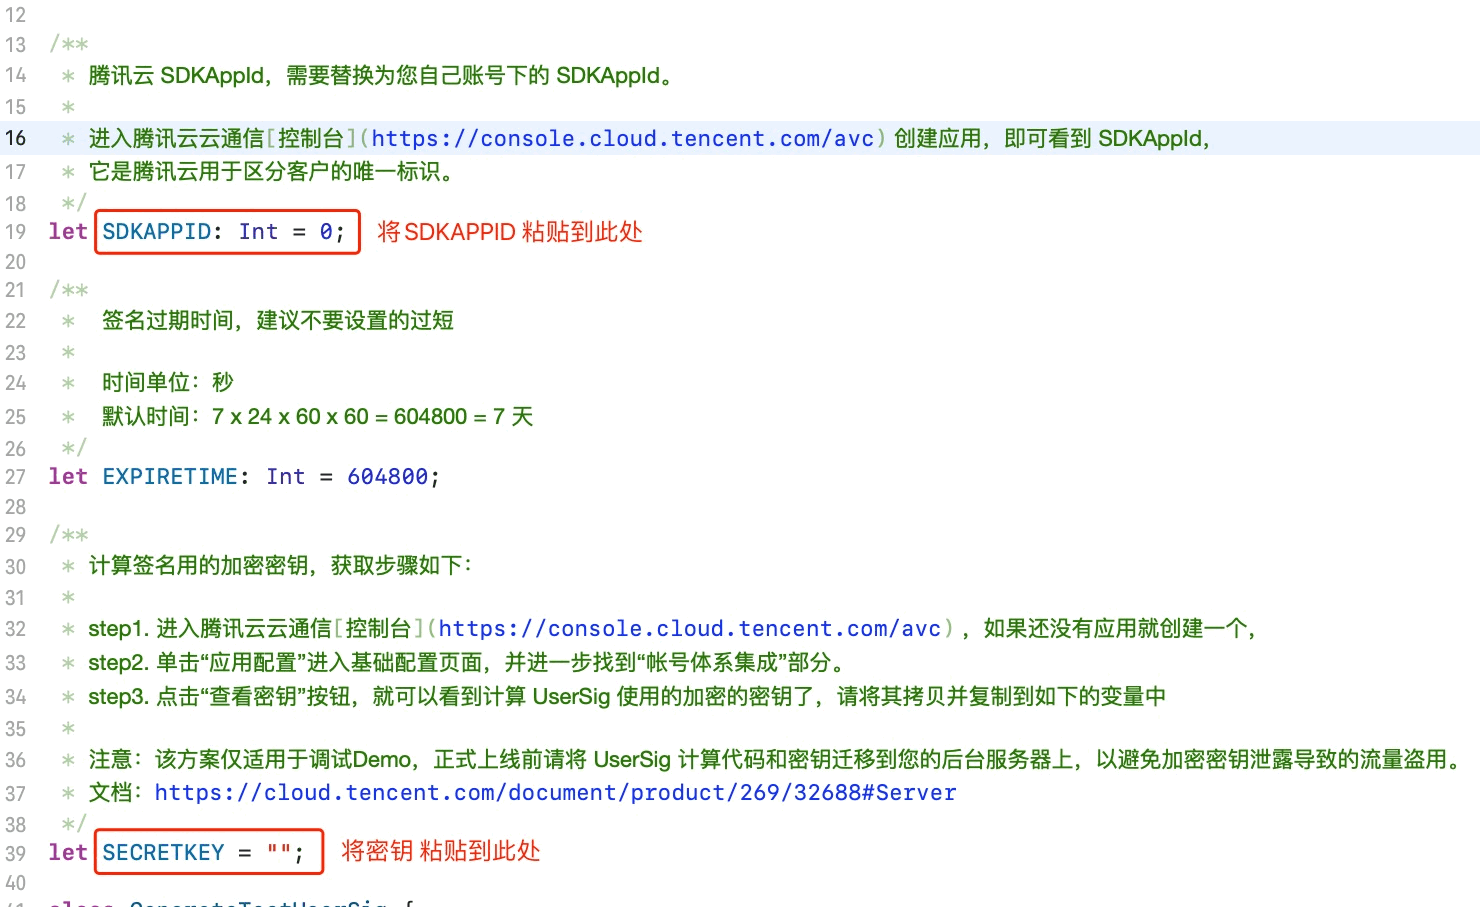
TUICallingApp.xcworkspacewith Xcode 11.0 or later. - Find the
iOS/Example/Debug/GenerateTestUserSig.swiftfile in the project. - Set the following parameters in
GenerateTestUserSig.swift:
- SDKAPPID: `0` by default. Set it to the actual `SDKAppID`.
- SECRETKEY: Left empty by default. Set it to the actual key.
Step 3. Compile and run the application
- Open Terminal, enter the project directory, run the
pod installcommand, and wait for it to complete. - Open the demo project
TUICalling/Example/TUICallingApp.xcworkspacewith Xcode 11.0 or later and click Run.
Step 4. Try out the demo
Note: You need to prepare at least two devices to try out the call feature of TUICalling. Here, users A and B represent two different devices:
Device A (userId: 111)
- Step 1: On the welcome page, enter the username (which must be unique), such as
111. - Step 2: Enter the different scenario pages, such as video call, based on your scenario and requirements.
- Step 3: Enter
userIdof user B to be called, click Search, and click Call.
Device B (userId: 222)
- Step 1: On the welcome page, enter the username (which must be unique), such as
222. - Step 2: Enter the homepage and wait for the call.
FAQs
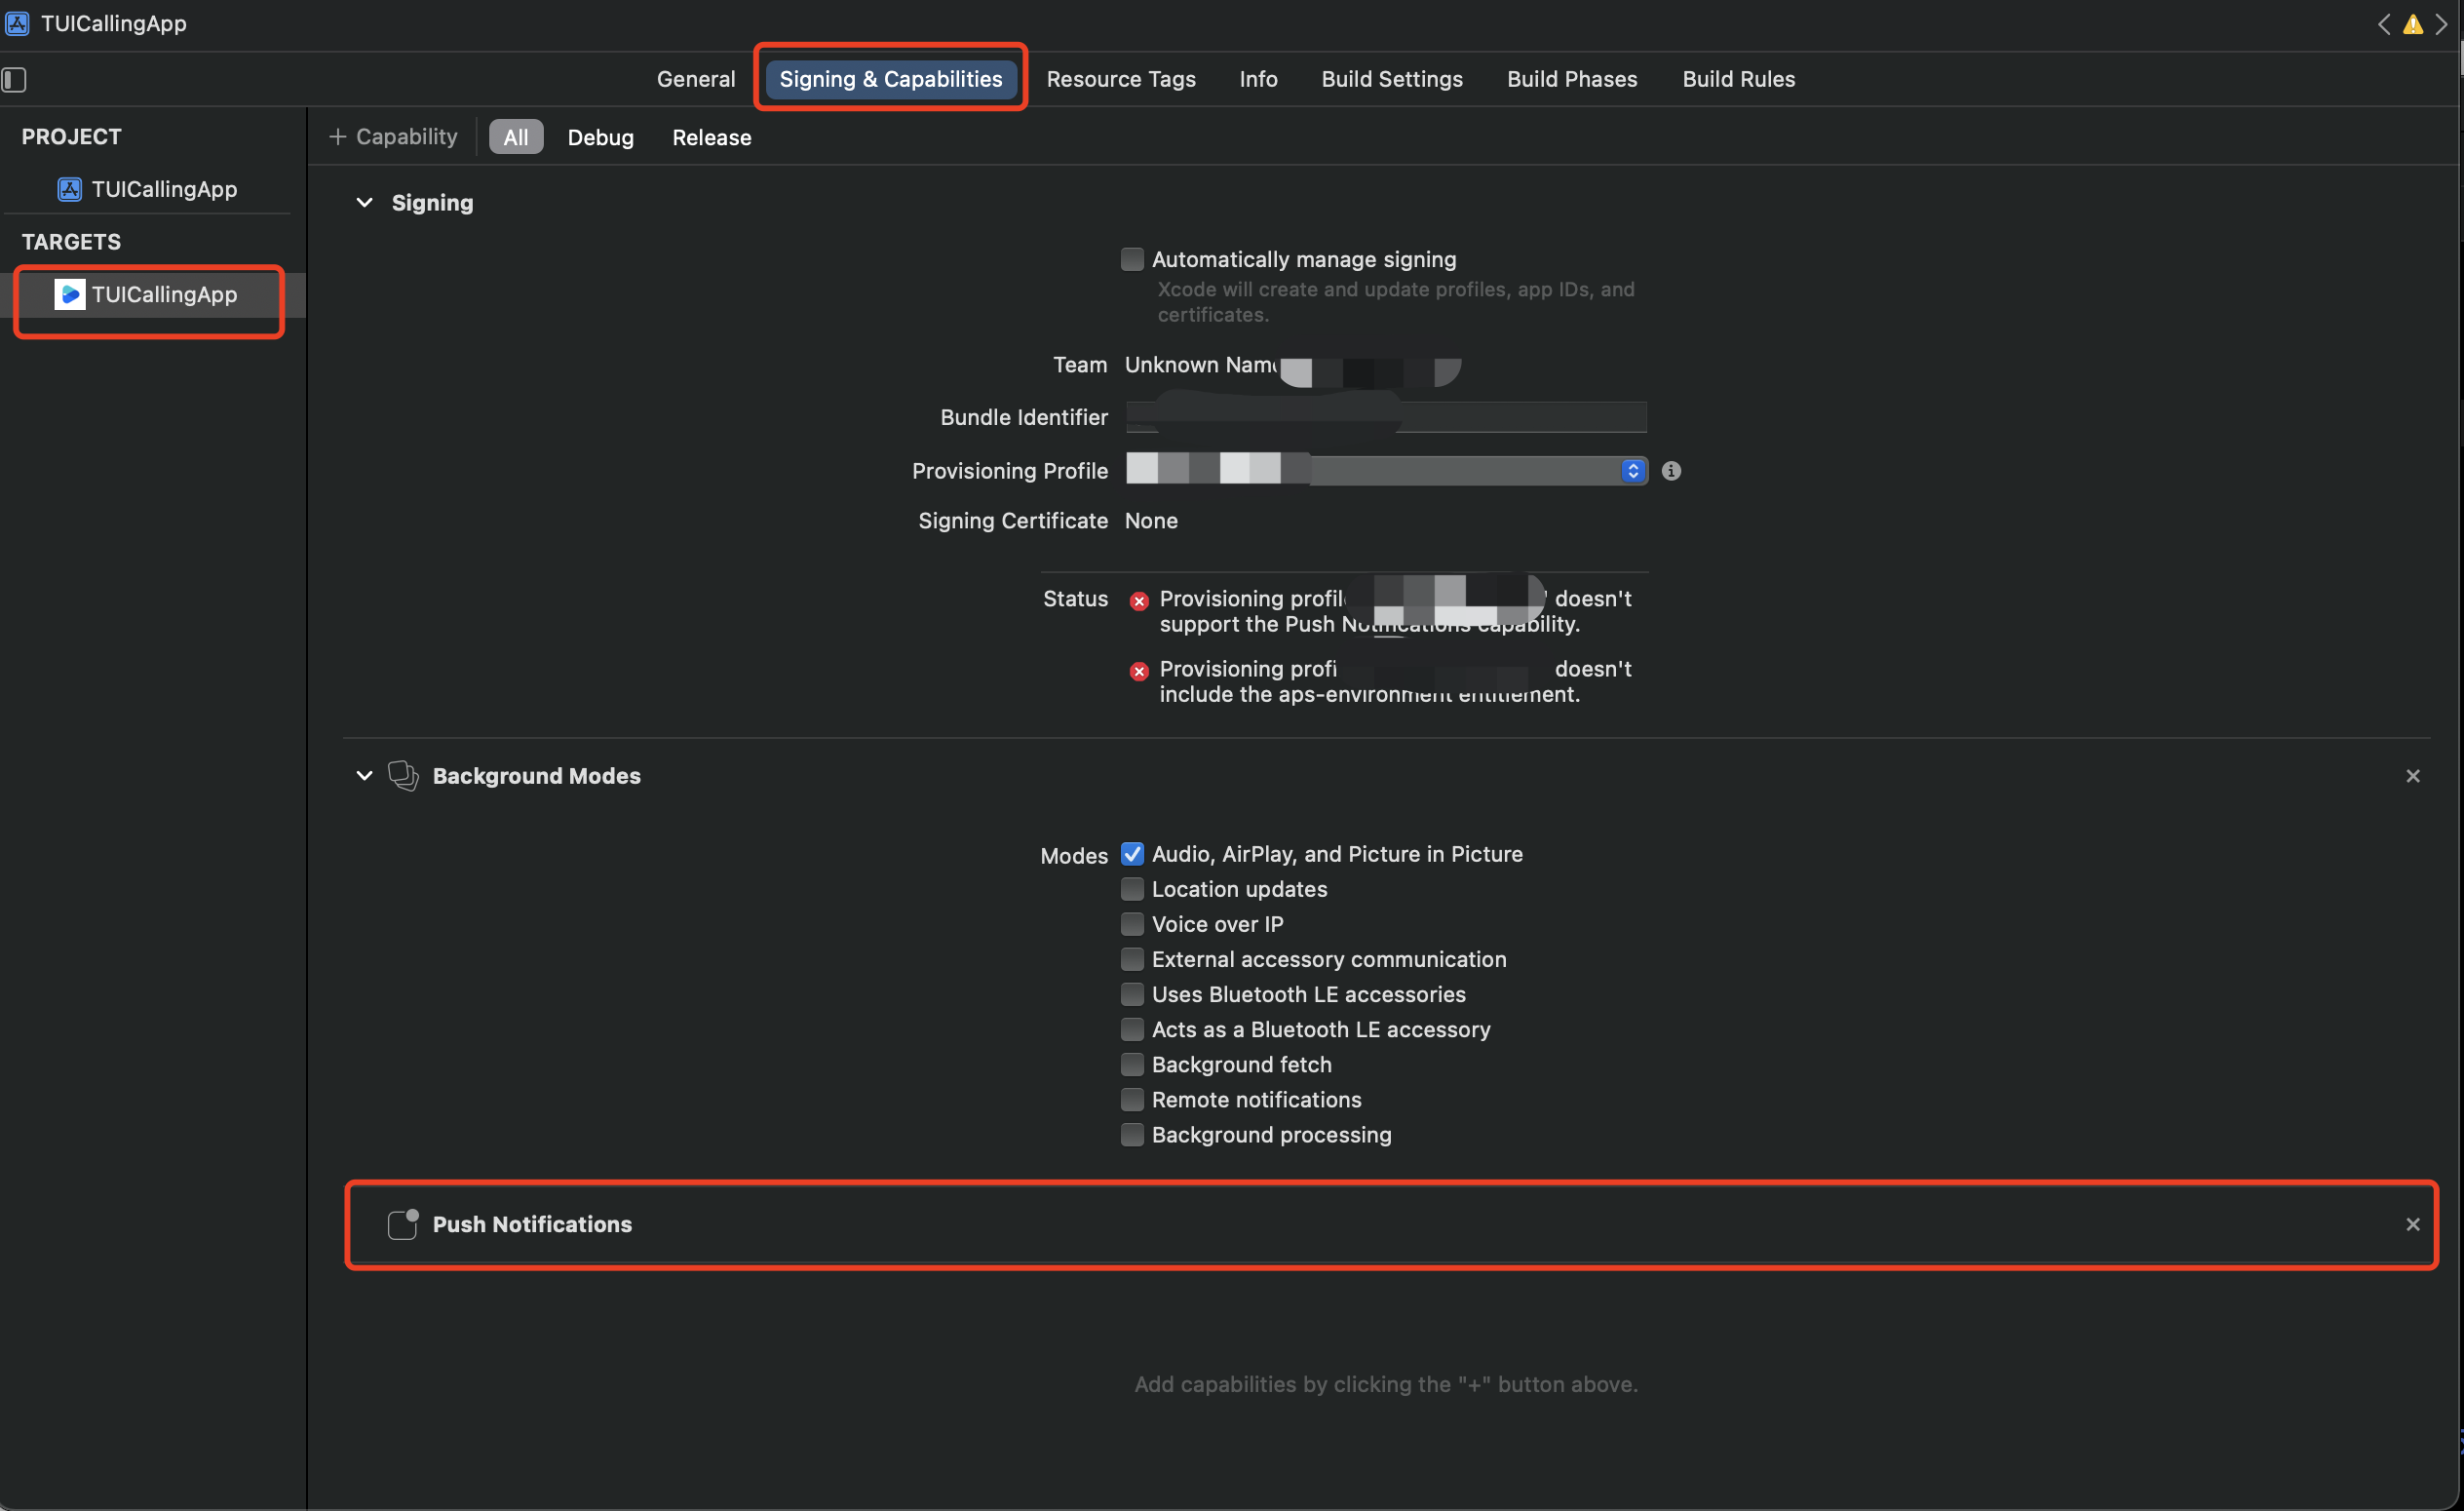
What should I do if the following error messages are still prompted during debugging on a real device when the TUICalling demo has been configured with a real device certificate?
Provisioning profile "XXXXXX" doesn't support the Push Notifications capability.
Provisioning profile "XXXXXX" doesn't include the aps-environment entitlement.
You can delete the Push Notifications feature as shown below:
Have any questions?
Welcome to join our Telegram Group to communicate with our professional engineers! We are more than happy to hear from you~ Click to join: https://t.me/+EPk6TMZEZMM5OGY1 Or scan the QR code