 palwfli
English | 简体中文
This document introduces how to quickly run the Tencent Cloud IM demo project. You only need to following the steps below:
1. Create an App
Go to the Tencent Cloud IM console. On the Application List page, click Create Application.
2. Get the Test userSig
Click Download Public/Private Key, and you will get a package named keys.zip. Decompress the package, and you will obtain two files: public_key and private_key. Open the private_key file with Notepad and copy and paste the content in the file to the Key input box on the Auxiliary Tools tab page.
On the Auxiliary Tools tab page, Identifier indicates your test account (userId), Key indicates the text content in the private_key file, and userSig indicates the generated signature. Identifier and userSig are in a one-to-one mapping relationship.
You can generate 4 more pairs of userId and userSig to facilitate debugging in step 5.
3. Download Demo Source Code
Download the IMSDK Windows ImApp project code.
4. Modify Source Code Configuration
-
In Visual Studio (VS2015 is recommended), double-click the
ImApp.slnproject file in the source code directory to open the ImApp project. -
The test SDKAppID and four test accounts generated in the console are configured in the project by default. Since each account can log in to only one terminal at a time, you need to follow the instructions in step 3 to get your 4 test accounts and configure them.
-
In the
main.cppfile, use your SDKAppID and the userId and userSig obtained in step 3 to replace the corresponding values.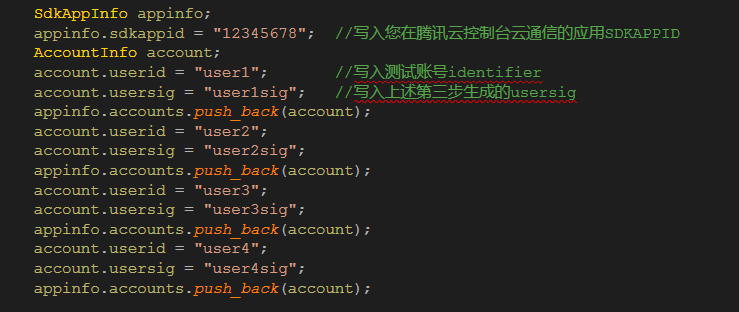
! The method of obtaining the userId and userSig described here is only suitable for the local execution and debugging of the demo. For the correct userSig distribution method, see here.
5. Compile and Run the Demo
After the demo is started, log in to different accounts on different clients, and search for the userId of the other party to create a conversation and send messages.