 lynxzhang
English | 简体中文
This document introduces how to quickly run through the IM demo.
Step 1. Create an App
- Log in to the IM console.
If you already have an app, record its SDKAppID and configure the app.
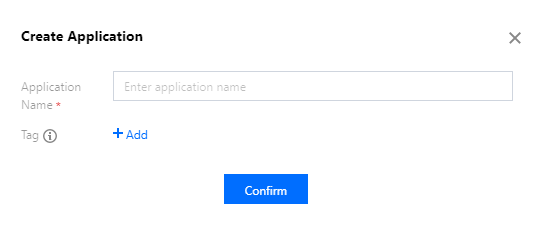
- Click Create Application, enter your app name, and click Confirm.
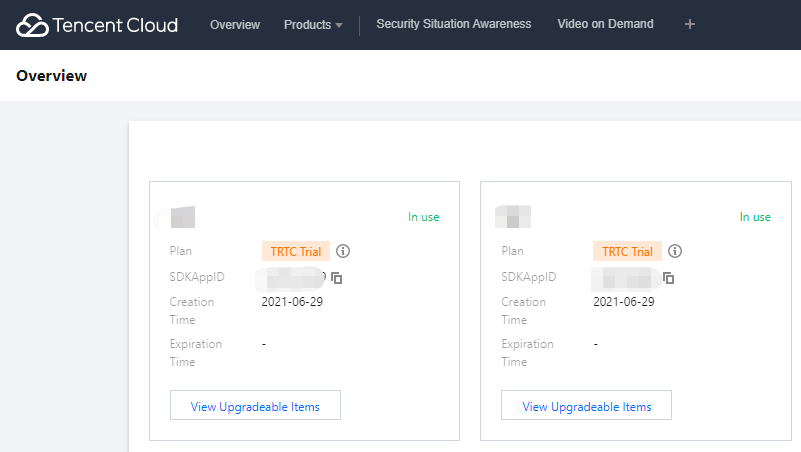
- After creation, you can see the status, service version, SDKAppID, creation time, tag, and expiry time of the new app on the overview page of the console. Record the SDKAppID.
Step 2: Obtain Key Information
- Click the target app card to go to the basic configuration page of the app.
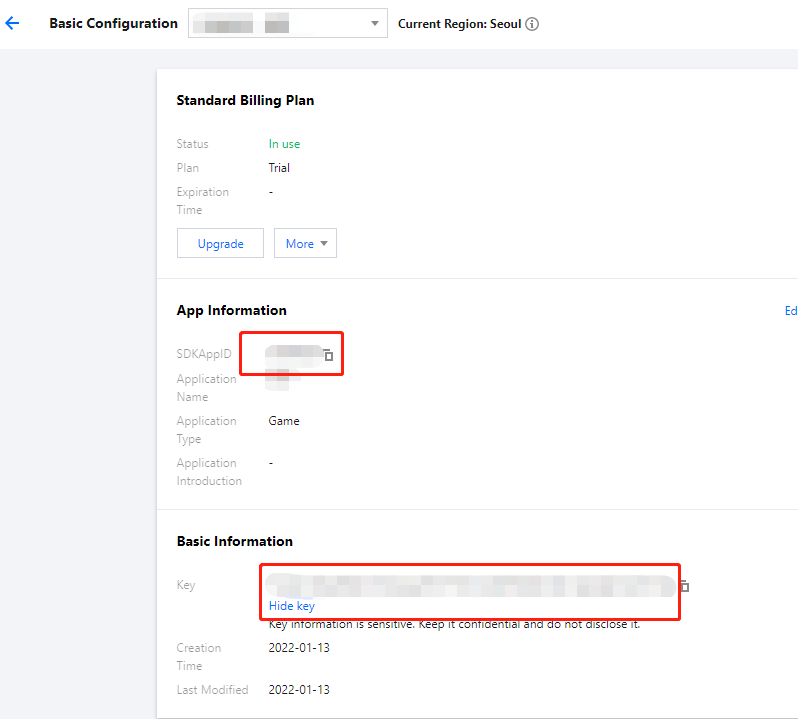
- In the Basic Information area, click Display key, and then copy and save the key information.
Please store the key information properly to prevent leakage.
Step 3: Download and Configure the Demo Source Code
- Clone the IM demo project from GitHub.
- Open the project in the terminal directory and find the
GenerateTestUserSigfile.
| Platform | Relative Path to File |
|---|---|
| Android | Android/Demo/app/src/main/java/com/tencent/qcloud/tim/demo/signature/GenerateTestUserSig.java |
| iOS | iOS/Demo/TUIKitDemo/Debug/GenerateTestUserSig.h |
| macOS | Mac/Demo/TUIKitDemo/Debug/GenerateTestUserSig.h |
| Windows | Windows/Demo/IMApp/GenerateTestUserSig.h |
| Web (general) | Web/Demo/public/GenerateTestUserSig.js |
| Mini Program | MiniProgram/Demo/static/utils/GenerateTestUserSig.js |
? In this document, an Android project is opened by using Android Studio as an example.
- Set relevant parameters in the
GenerateTestUserSigfile:
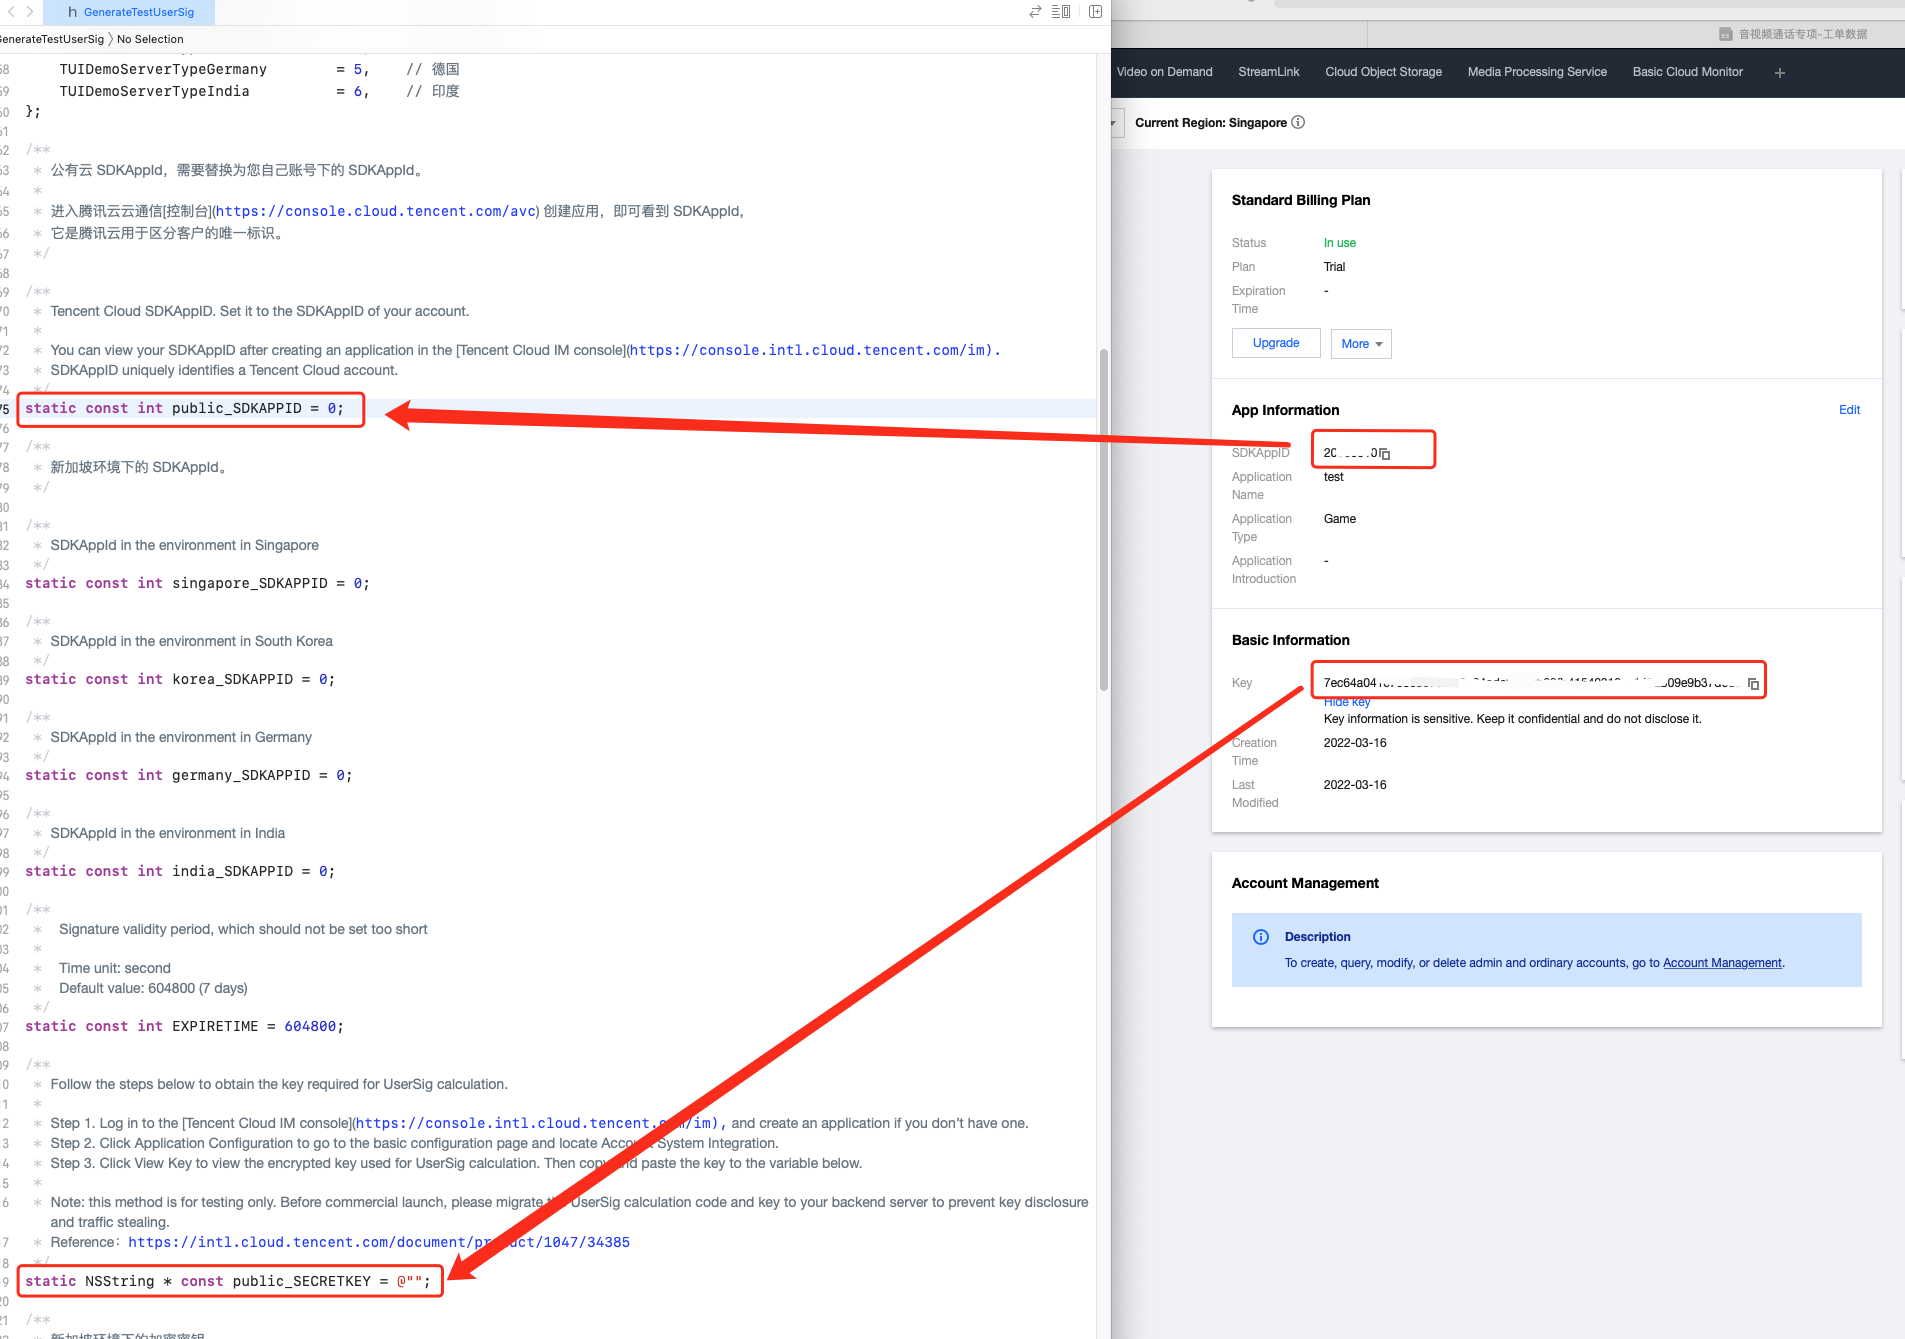
! In this document, the method to obtain UserSig is to configure a SECRETKEY in the client code. In this method, the SECRETKEY is vulnerable to decompilation and reverse engineering. Once your SECRETKEY is leaked, attackers can steal your Tencent Cloud traffic. Therefore, this method is only suitable for locally running a demo project and feature debugging. The correct
UserSigdistribution method is to integrate the calculation code ofUserSiginto your server and provide an application-oriented API. WhenUserSigis needed, your app can send a request to the business server for a dynamicUserSig. For more information, please see How do I calculate UserSig on the server?.
Step 4: Compile and Run the Demo
- Run the following command on the terminal to check the pod version:
pod --version
If the system indicates that no pod exists or that the pod version is earlier than 1.7.5, run the following commands to install the latest pod.
// Change sources.
gem sources --remove https://rubygems.org/
gem sources --add https://gems.ruby-china.com/
// Install pod.
sudo gem install cocoapods -n /usr/local/bin
// If multiple versions of Xcode are installed, run the following command to choose an Xcode version (usually the latest one):
sudo xcode-select -switch /Applications/Xcode.app/Contents/Developer
// Update the local pod library.
pod setup
- Run the following commands to load the IMSDK library.
cd Mac/TUIKitDemo
pod install
- If installation fails, run the following command to update the local CocoaPods repository list:
pod repo update
- Go to the Mac/TUIKitDemo folder, and open
TUIKitDemo.xcworkspaceto compile and run the demo.